Using Custom CSS and JavaScript
Adding CSS or JavaScript to a theme.
Custom code can be added either directly in the Theme Designer or as specific uploaded files.
Open the Theme Designer
Use the "." shortcut key to open the Designer, then Click on the Theme Tab and turn the Designer to "On".
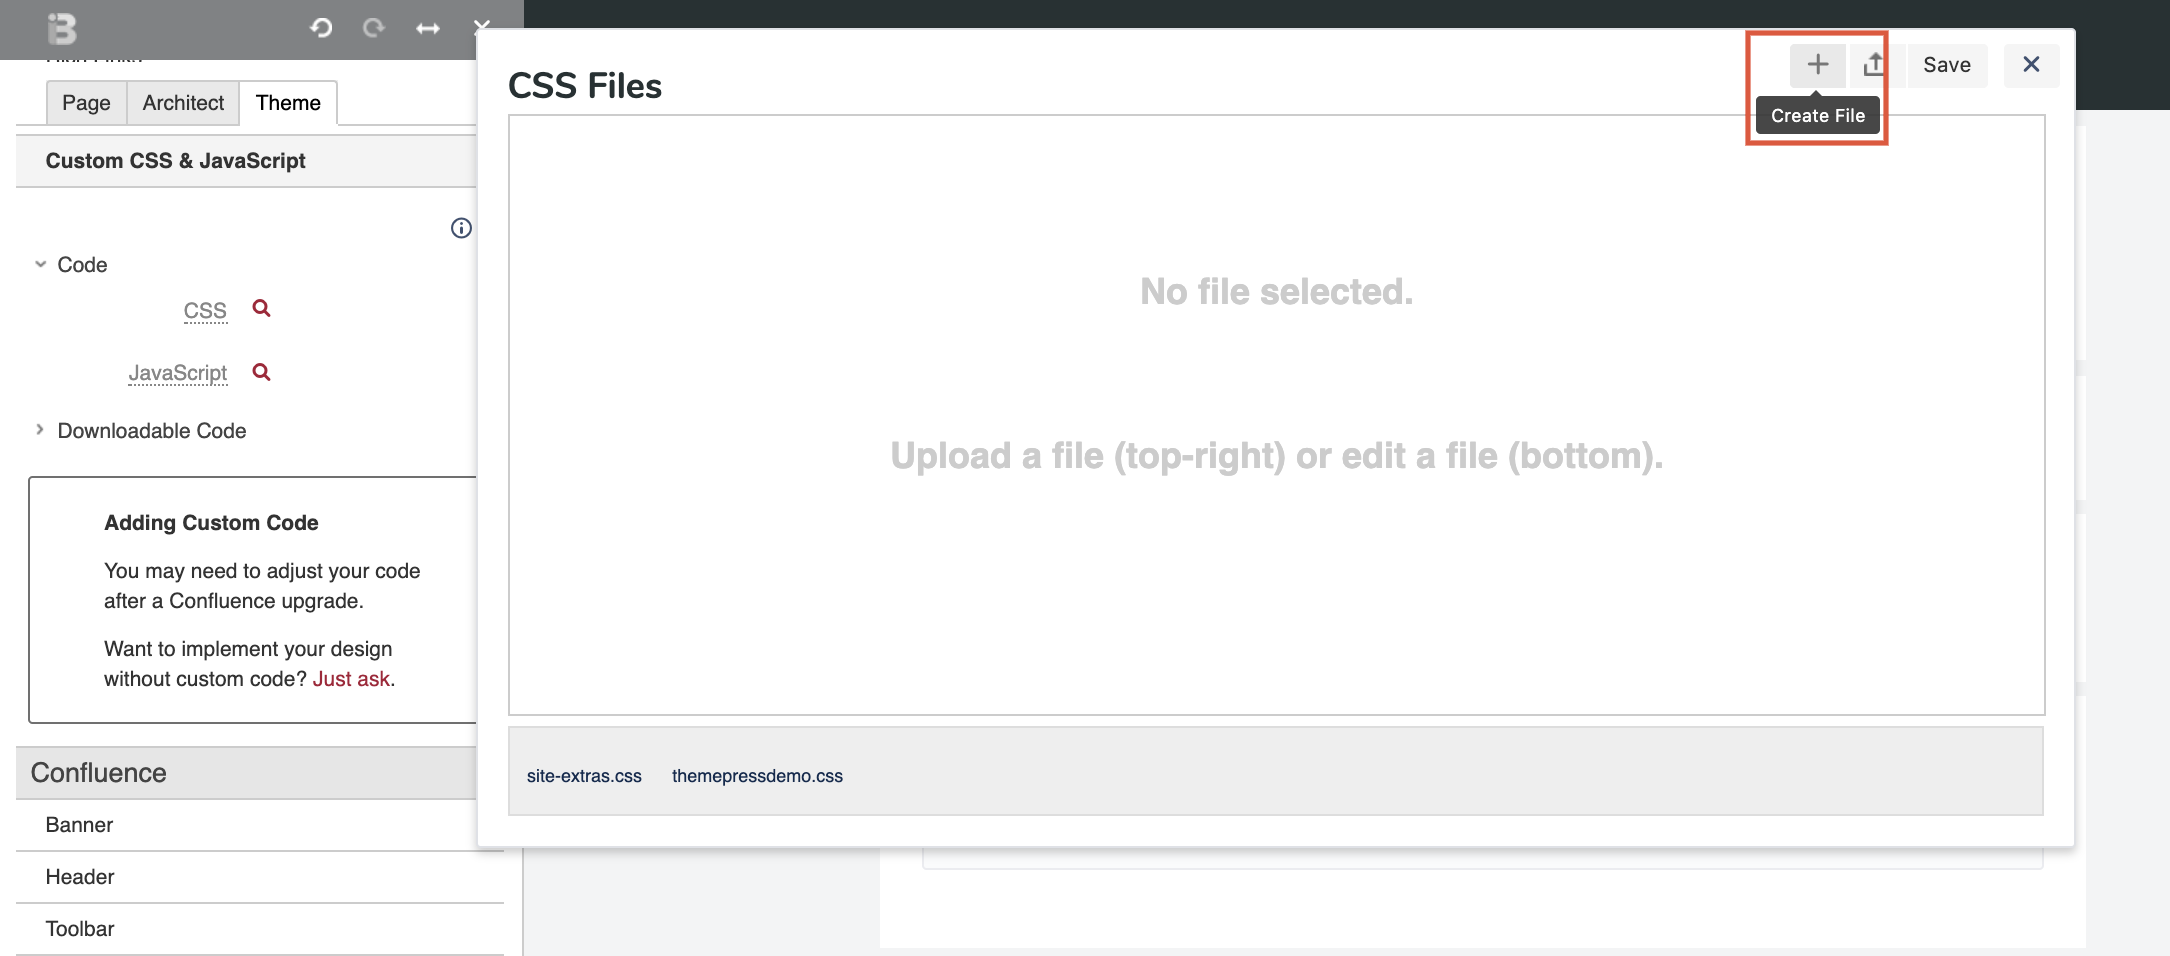
Navigate to the Code section of the Theme Designer
Click the magnifying glass to the right of CSS or JavaScript, which will open a dialog box.
To upload a file, click the upload button ().
To add custom CSS or Javascript directly to Theme Press, click the add button ().
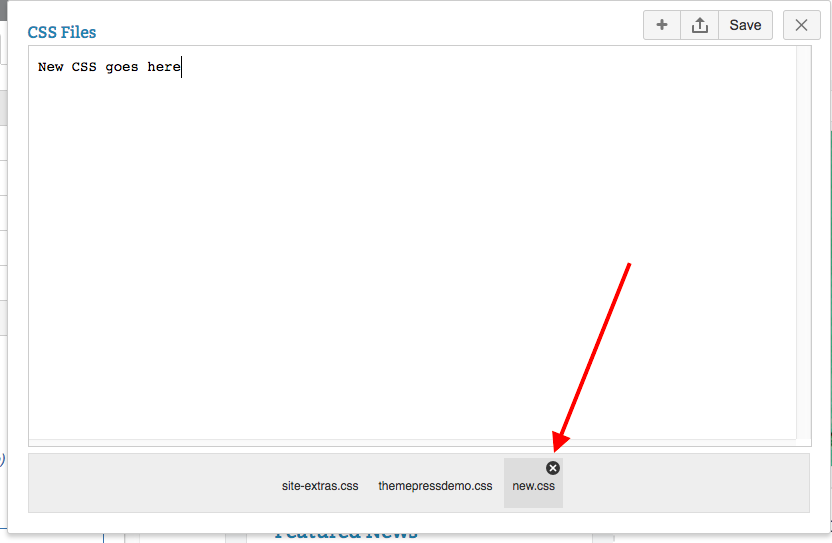
- The New (CSS or JavaScript) File window opens.
- Name your file (there is no need to add ".css" or ".js" to your file, this will be done automatically)
- Enter your code. Be sure to enter valid code using the appropriate syntax for comments and statements.
Need to delete a file? Hover over the file you wish to delete and click the X.
Editing or Deleting your CSS or JavaScript files outside of Theme Press?
There may be situations where you will need to edit or delete your CSS or JavaScript directly in your operating system, without using the Theme Designer.
- Your CSS files are located in a "css" folder in your system:
- Your JavaScript files are located in a "scripts" folder in your system:
Use caution when adding custom CSS and JavaScript
Whenever possible, we recommend using the design functionality of Theme Press rather than adding custom CSS or JavaScript. This ensures that your theme is 'future proof'; as both Confluence and Theme Press issue updates, your theme will continue to work well.
- A theme highly customized with CSS will need to be extensively reviewed and potentially rebuilt, in order to 'map' to any changes made in the underlying structure after software updates.
- Because Theme Press is a Confluence App, there are multiple levels of CSS to override, and in such a dynamic environment, using the designer ensures that you are targeting elements with the correct level of specificity.


