Add the font files to your Confluence home directory.To complete this step, you must have access to the server/computer on which Confluence was installed. You should have your set of purchased font files accessible. Add custom supporting CSS to your Theme.Your packaged web-font files will contain key information needed to create a CSS file, including: - font-family name
- font key
- The name of your font file (minus the extension) is the font's key.
- font style
- font weight
- font ID
- You can find the font ID in the .svg file.
Once you have located the key information, add a CSS file named embedded-fonts.css with the following format for each font: copied over: When defining font families, use the following format. Be sure to use highly readable fonts that render well in all browsers. Theme Press Control Panel > Theme Tab > Content > Fonts > Choices > Font Families  Image Removed Image Removed
| Code Block |
|---|
| language | css |
|---|
| theme | Confluence |
|---|
| title | Format |
|---|
| fontFamily1: #embeddedFontFace("<font-family name 1>name>", "<font name 2>key>", "<font name 3>";
fontFamily2:style>" "<font name 1>weight>", "<font name 2>", "<font name 3>"; |
| Code Block |
|---|
| fontFamily1: "Helvetica Neue", Helvetica, Arial, sans-serif;
fontFamily2: Georgia, Times, "Times New Roman", serif; |
Font names with one word do not need quotes. You can add additional families as needed. Use h4 for section headingsIf you don't want numbers in the section headings, simply remove the "numbered" class from this block. Note/Tip/Warning/Info blocks below are collapsed by default. If you want to use any of these, try to keep to just one per page. You may use two if necessary, but in general, try to limit these.
Example
#embeddedFontFace("Graphik Bold Web" "Graphik-Bold-Web" "normal" "bold" "Graphik-Bold-Web")
| HTML Wrap |
|---|
| 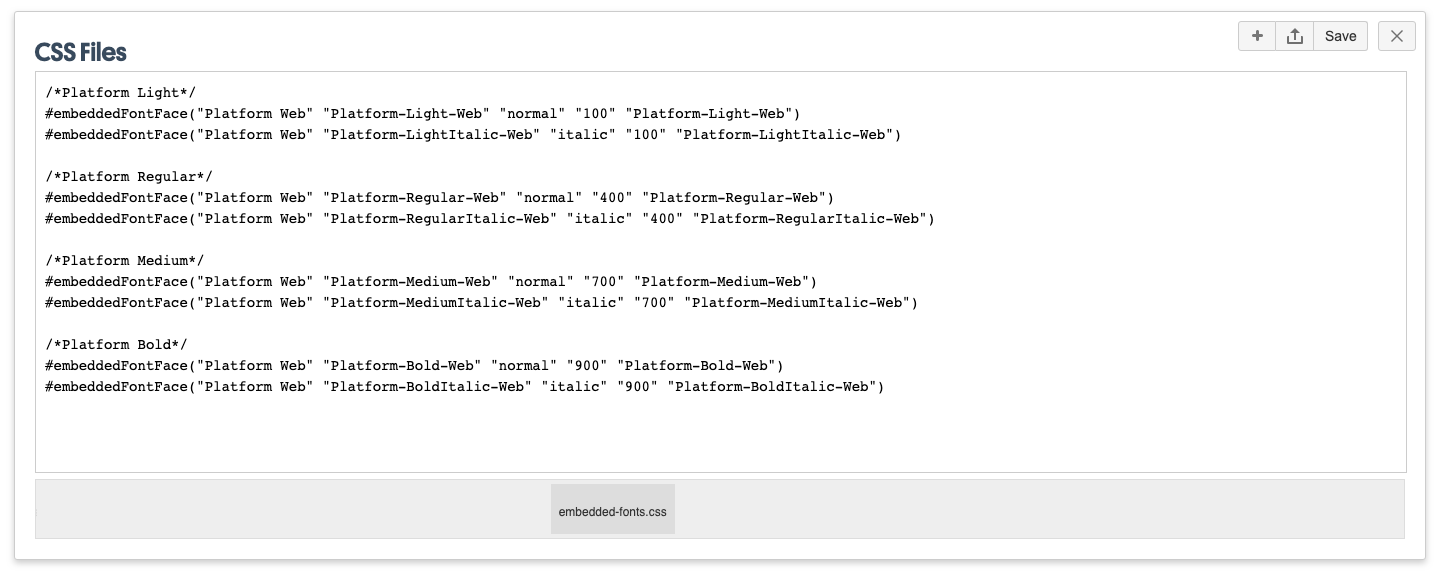 Image Added Image Added
|
| 


