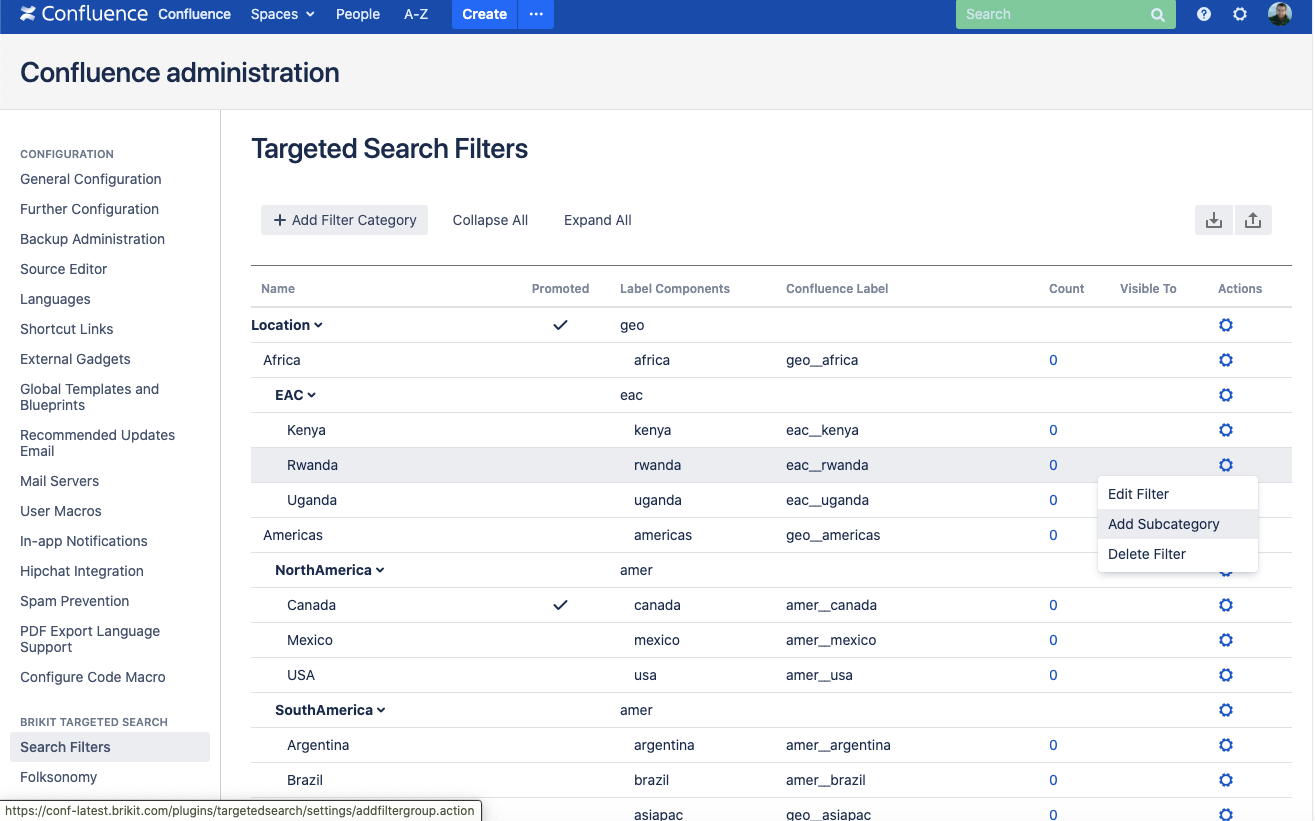
Start with a filter group named with the broadest term to describe the set of filters within. This term will be the heading on display for all the filters that come under it, so it should be clear and distinct from other filter groups. Optionally, add a filter prefixA filter prefix can help organize filter label names (as opposed to the human-readable name). They also disambiguate filters used in other filter groups that have the same name but different meanings. The next 'level' down is a filter. This filter acts as a "parent filter" that describes what subcategories and filters will come 'below' it. Additionally, this filter will be automatically applied to content whenever one of its lower level filters is applied, this ensures that 'parent filters' act as the broadest bucket of content and each level should retrieve narrower and narrower result sets. Create a subcategoryTo do so, click on the gear icon to the right of the filter and select "Add Subcategory". Like a filter group, you add a name and an optional filter prefix. Add filtersAdd as many filters as makes sense within this subcategory. If need be, create additional subcategories and filters by repeating the steps above. There is no limit to the number of nested levels. | HTML Wrap |
|---|
| 
|
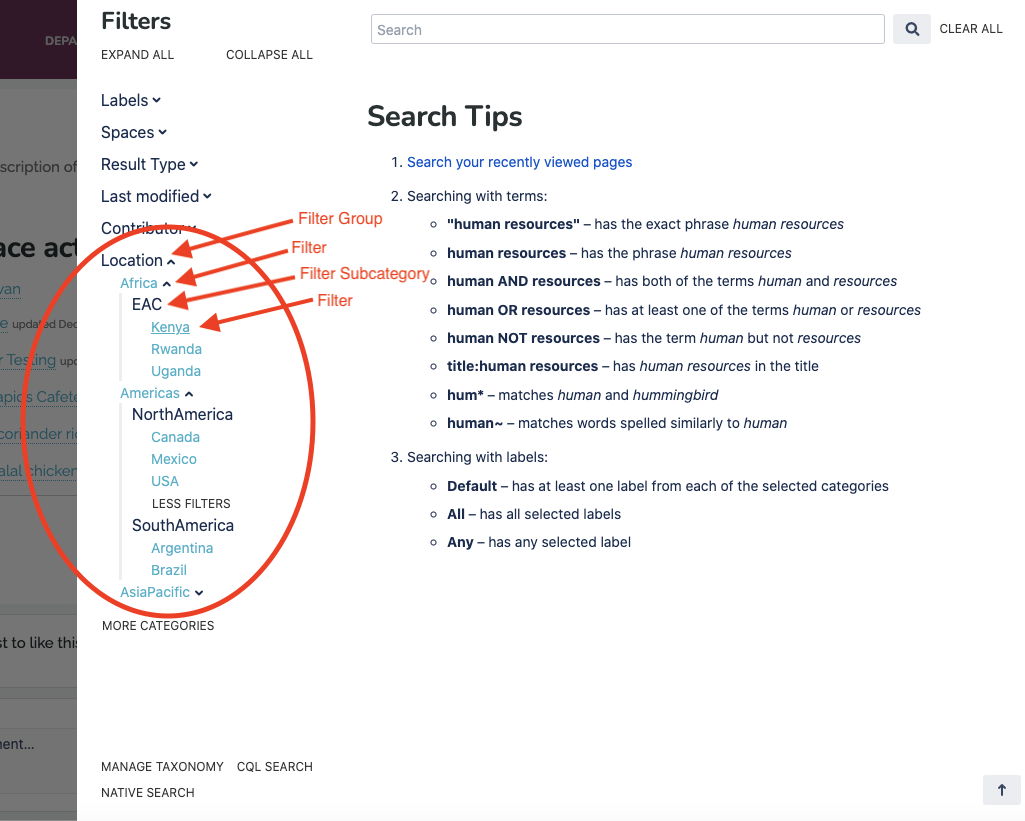
You will now see these filter groups, filters, and filter subcategories reflected in the search panel (see screenshot below), label application window, and interactive search macro. | HTML Wrap |
|---|
| 
|
Label your contentNow you can start labeling pages, blogposts, and attachments using these filters. You can also use any of these filters as a cascading filter to automatically apply it to a page and all of its child pages.
| 


