Navigate to the Available WorkflowsFrom any page in the space where you want a workflow, open the Confluence Sidebar. Next, click the "gear" icon that says "Space Tools" (note: it is in the lower left corner of the screen). From the Space Tools menu, click on "Content Tools". This will take you to the space backend. Here, find and click the tab called "Apps" (at the far right-side of the list of tabs). The "Apps" tab opens up a new set of sub-tabs, one of these is called Available Workflows. Here you can create a new workflow or see the existing workflows that are available for use in this space. | HTML Wrap |
|---|
| 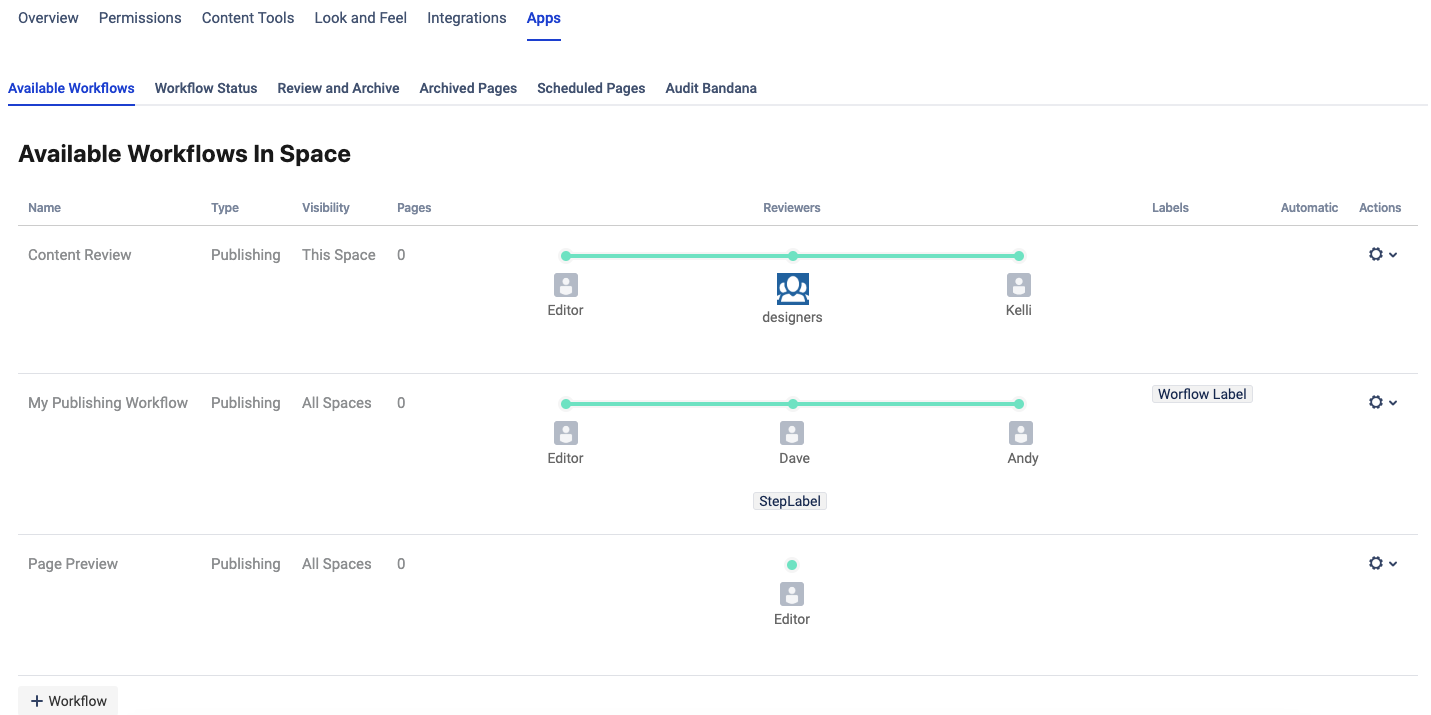 Image Added Image Added
|
Add a New WorkflowUnder the list of available workflows, click the "+Workflow" button to add a new workflow. Describe the WorkflowA new workflow menu opens, called the Workflow Wizard. There are two tabs in the Wizard. The first tab defines the workflow, including it's name, type, visibility, and initial label. For type, you can choose either a Routing Workflow or a Publishing Workflow. | HTML Wrap |
|---|
| 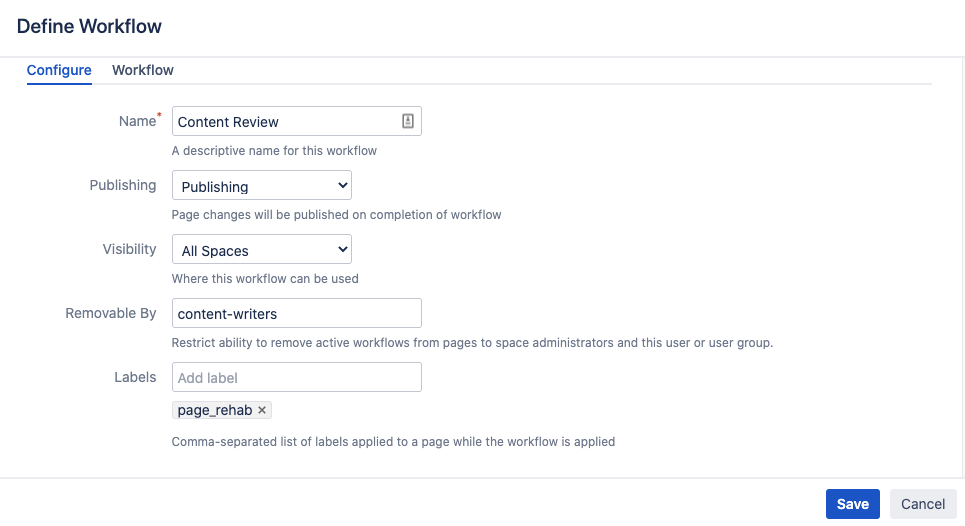 Image Added Image Added
|
Enter the details about your workflow in the first tab and then click the second tab to add steps. You can also specify an individual user or group who can remove the workflow once it has been initiated. Simply enter a username or group into the "Removable By" field. This ensures additional control over the content creation process. Add StepsThe second tab defines the workflow steps. Each step corresponds to a reviewer (or group of reviewers) and label. | HTML Wrap |
|---|
| 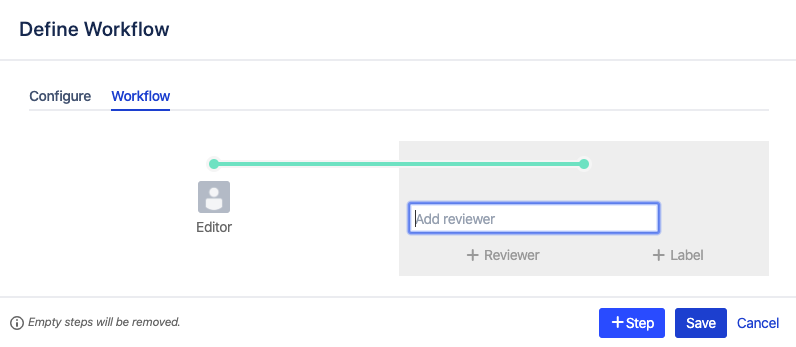 Image Added Image Added
|
To add a step, click the "+Step" button. To add a reviewer, click "+Reviewer" and start typing an individual user or group, then select the name from the drop-down list. You may add multiple reviewers to any step, just click the "+Reviewer" button again and add another individual or group.
To add a label, click the "+Label" button. Enter the label name and press the "enter" or "return" key on your keyboard to save the label into the step. To add another step, simply press the "+Step" button. SaveWhen finished adding information and steps, press the "Save" button. That's it! 0 Use h4 for section headingsIf you don't want numbers in the section headings, simply remove the "numbered" class from this block. Note/Tip/Warning/Info blocks below are collapsed by default. If you want to use any of these, try to keep to just one per page. You may use two if necessary, but in general, try to limit these. | 


